
Throughout history, creating arts and crafts has been essential to our society. Not only does it have a practical use, but it also positively affects our mental well-being. There are actually a lot of benefits that come with doing arts and crafts. With how pleasing it is, people naturally gravitate towards it as a primary hobby or short of income. There are many kinds of crafts that you can learn to make, but today, we will be teaching you how to make a specific one: Stickers.
While having someone print a sticker for you is simpler, it’s much more fun to create your own version. However, it can be challenging to get high-quality materials like adhesives. If you want to make a sticker without worrying about the cost, consider using tape. We’ve created this guide to help you create your own stickers with tapes.
Let’s look at what you’ll need and what you’ll be doing.
What You Need
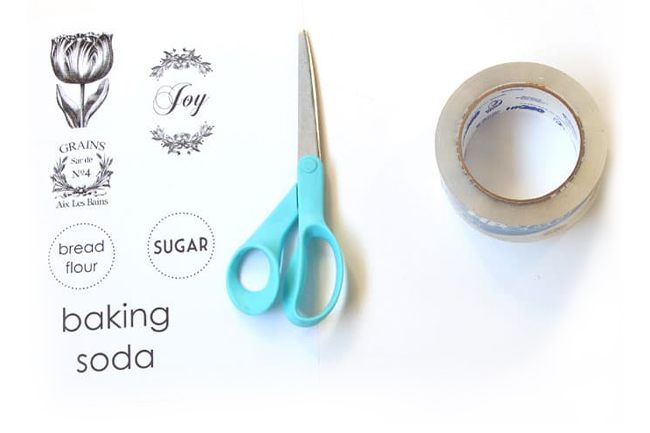
The first thing that you need to do is gather some materials for your project. We’ve made the list relatively simple, and you can quickly get these from your local hobby shop. Here’s what you need:
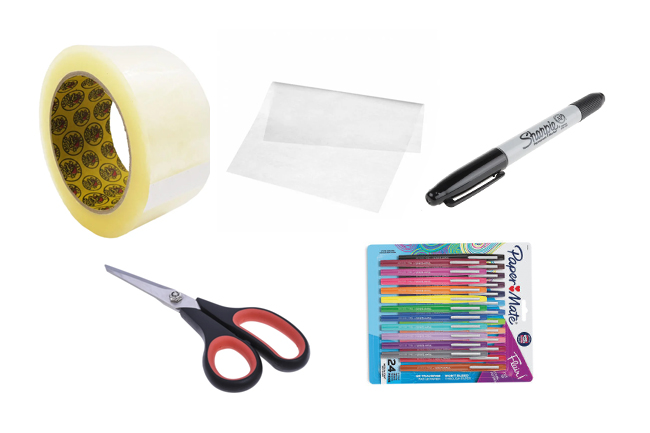
- Transparent or packaging tape (clear or coloured)
- Scissors
- Waxpaper or parchment
- Pen and markers
- Optional: colouring materials
With all of these on hand, you can start customising your homemade stickers like those meant for your laptops.
What You’ll Be Doing
- Print and Cut out Your Design
So, with your materials ready, you should start printing out your design. (Note: if you haven’t done so yet, there’s a wealth of guides online that can help you find the right design ideas) Once you have the design you want, start touching it up. Aside from the design on the print, you can use colours, pens, and markers to make it look even better than before. Doing this also adds a personal touch to your creation.
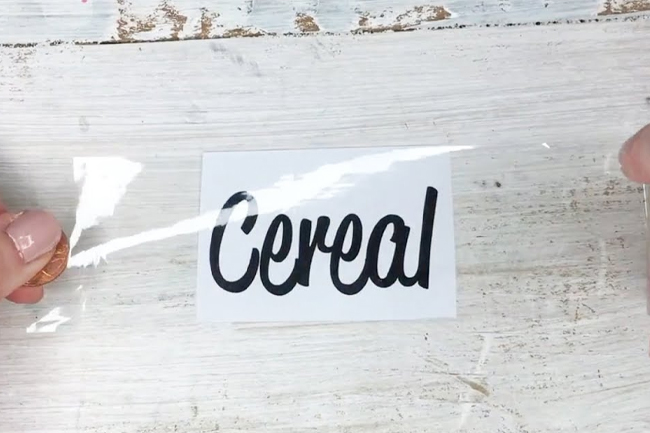
- Cover the Design with Tape
The next step requires taking your wax paper/parchment and the clear packaging tape. Cut a piece of tape slightly larger than your design and stick it onto the wax paper or parchment.
(Note: To achieve a cleaner look, we recommend using a smaller design to make sticking the tape easier.)
Then, you place your design on top of the tape. Next, you want to cut another piece of tape similar to what you’ve done before and stick it over your design. Make sure that this is done precisely. You want to avoid removing the tape later and destroying your design.
- Remove Any Air Bubbles and Creases
You might notice air bubbles and creases after placing the tape layer on your design. As you want your stickers to look professional, you’ll want to remove these. You can use your hand or credit card to smooth the bubbles over; make sure you are pushing them out towards the edges. We recommend using something like a credit card to smooth everything out. Doing this ensures that the tape is bound to the paper properly.
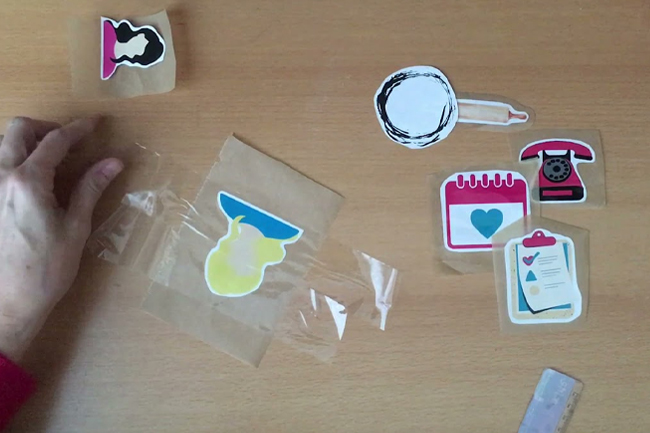
- The Finishing Touches
It’s time for the finale. With the wax paper or parchment still intact, you’ll want to cut around the sticker’s edges and remove any excess tape left. You should follow your outline or create a border around it. Continue to polish it by softening any edges for a cleaner look.
Once you’re all done, you can make use of the sticker. Peel the wax or parchment off the back and stick it onto any surface. However, we recommend that you inspect the surface beforehand. Some can be incompatible with the kind of sticker that you’ve just made. Since your sticker is made of paper, it may not last like those made from vinyl stickers.

Final Thoughts
Creating things like stickers can be incredibly fun. You can use many designs without worrying about it costing a ton of money. But if you need a sticker as a point of reference, we recommend seeking professionals to help you with sticker printing. Find the best ones that fit your preferences and start designing away.